From Blank Walls to Art Galleries with DIY Wall Art
DIY wall art turns empty walls into personal showcases without professional help or expensive materials. Many renters and homeowners feel nervous about decorating their walls because they might damage them. The good news is that you can create beautiful wall displays while keeping your surfaces and security deposit intact.
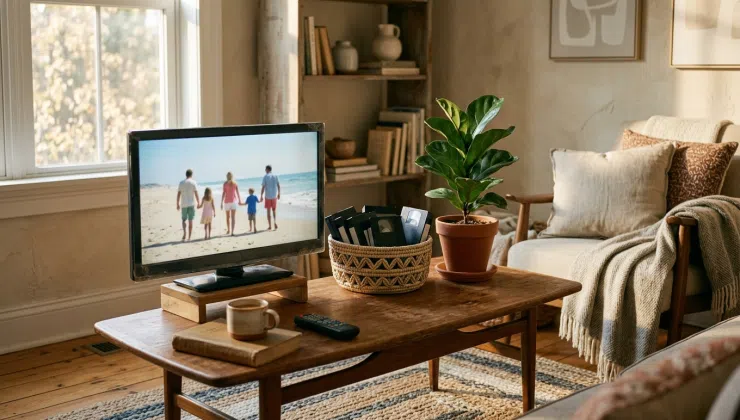
Command Strips work like magic to avoid nailing into walls. These handy tools can support frames up to 16 pounds for gallery wall creation. Peel-and-stick wallpaper has emerged as one of the most adaptable, renter-friendly wall decor tools. This versatile option works great for feature walls in living rooms, bedrooms, and small hallways. This piece explores creative DIY wall art ideas that let you express yourself without leaving permanent marks.
We’ve gathered our favorite damage-free decorating techniques that give you room to experiment with your space. Your walls and deposit stay safe while you try different looks – from adhesive hanging solutions to leaning art arrangements. These methods help you decorate with confidence.
Use adhesive strips for framed art
Adhesive picture hanging strips are now the top choice to display framed art without wall damage. These clever products work like Velcro – one strip sticks to the wall, the other to the frame. They lock together and can hold up more weight than you might expect.
Why adhesive strips are renter-friendly
Adhesive strips like Command™ Strips won’t damage your walls when you use them right. You won’t find any holes, cracked plaster, or sticky residue when you take them down to redecorate or move out. Renters love these strips because they help get their security deposits back. Anyone who doesn’t want permanent changes can create DIY wall art displays without the lasting impact of nails and screws.
Best surfaces for application
Some surfaces work better than others with adhesive strips. They stick best to smooth, clean surfaces like painted drywall, glass, tile, metal, and finished wood. Clean your wall with isopropyl alcohol before you put up the strips. The timing matters too – let fresh paint cure for at least seven days before adding any strips.
These strips won’t work well on every surface. Stay away from textured walls, wallpaper, brick, rough surfaces, or delicate materials. Product packaging will tell you which surfaces work best.
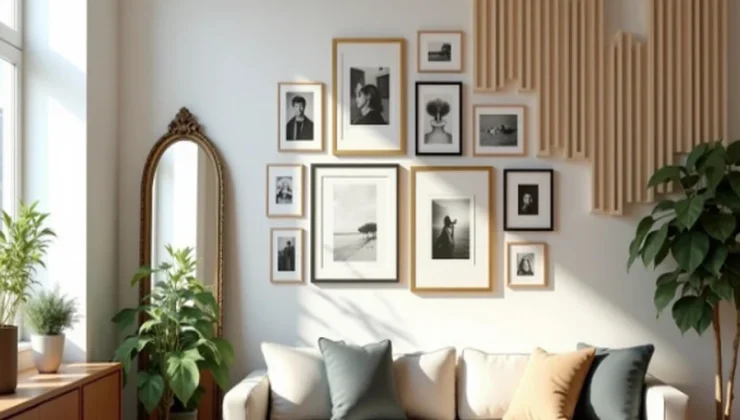
Tips for creating a gallery wall
A gallery wall transforms blank walls into a personal showcase, but it works best with a little planning. Lay your frames out on the floor first to experiment with spacing, orientation, and combinations of sizes. Mix photos, prints, and DIY pieces for variety, and consider adding original oil paintings on canvas as a focal point.
Their rich textures and colors create depth and interest. Use adhesive strips or picture hooks suitable for your wall type, pressing firmly and letting them set before hanging. Keep spacing consistent, around 2 to 3 inches, and step back frequently to adjust until the arrangement feels balanced and visually engaging.
Add Personalized Art to Your Walls
Custom art pieces tell your unique story and add more than just decoration to your space. Blank walls become meaningful focal points that spark conversation when you create DIY wall art that shows your personality instead of using mass-produced prints.
How to choose DIY pieces that reflect your style
Your artistic style emerges through exploration and observation. Take time to visit galleries, look at online collections, and notice which pieces make your heart skip a beat. Your instincts matter – that flutter in your chest when you see art you love is your inner critic talking. Let these feelings guide you when picking pieces for your home.
These steps will help you find patterns in what you like:
- Make a physical or digital collection of images you love (Pinterest works well for this)
- Look at the colors that dominate your space and pick art that goes with this palette
- Think about different mediums you enjoy—from photography to textile art or sculptures
Create a focal point with custom paint by number
These kits let you turn special photographs into unique artwork anyone can make. Custom paint by number from photo convert your family portraits, pet photos, or vacation scenes into pre-drawn canvases with numbered sections and matching paints. You’ll end up with meaningful décor that saves special moments and adds your personal touch to the walls.
Making custom paint by number art does more than just decorate. The simple process of matching numbers to colors helps you stay mindful and relaxed as you focus on the present moment. The joy of creating something beautiful with your hands also helps reduce stress.
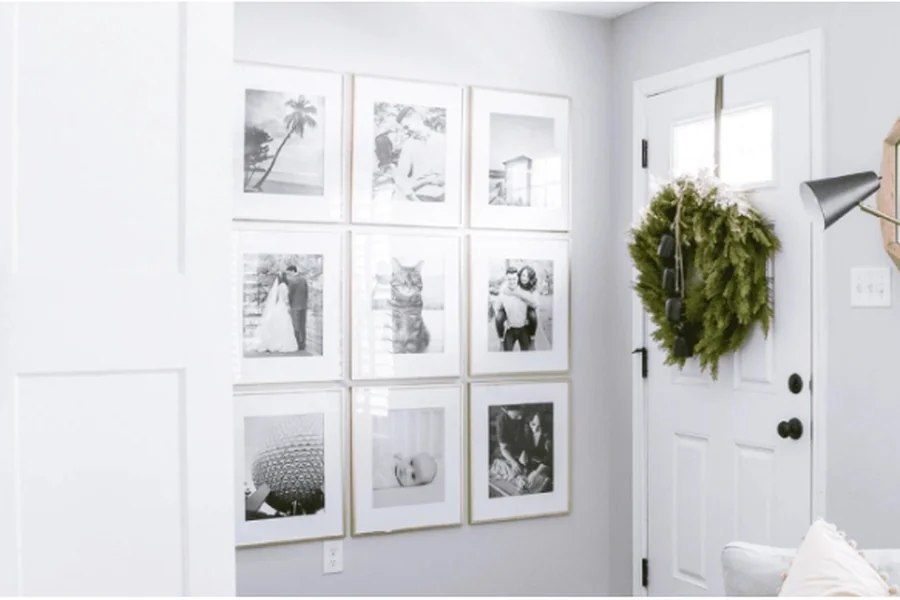
Arranging personalized pieces for a cohesive look
Your gallery display looks best when you group artwork with shared elements. You might put pieces with similar themes together (nature, urban landscapes, family photos) or organize them by color palette. Both ways create a visual flow that guides eyes across your collection.
Different sizes and orientations add energy to your display. Place larger statement pieces at eye level—about 57 inches from the floor—as anchor points. Keep 2-3 inches between frames for a clean look. You can add depth by mixing textures, like putting framed photographs next to textile art or small sculptures.
Lean mirrors and art for a no-drill solution
Leaning mirrors and artwork against walls provides a simple DIY wall art solution when you want to avoid drilling. This relaxed style adds sophistication to any space and preserves wall integrity—a perfect choice for renters and those who prefer flexibility.
How leaning decor adds depth
Leaning art creates depth that hanging pieces cannot match. This technique breaks traditional eye-level rules and invites a different kind of interaction with your décor. Light catches the slight angle differently and adds unexpected visual interest to flat walls. The best part is how leaning pieces bring a “quietly confident” vibe to your space—your home looks intentionally designed without trying too hard.
You can easily move pieces as seasons or moods change, which transforms a room’s atmosphere without much effort.
Best spots to place leaning mirrors
Corners serve as ideal spots for leaning mirrors. They take minimal space and create the illusion of more room. A full-length leaning mirror works great in entryways for that last-minute outfit check. You can create a dramatic impact by placing two similar mirrors on opposite sides of a fireplace to build symmetry and draw attention to this focal point.
Mirrors leaned at the bed’s end or against a wall near dressers add both function and style to bedrooms. The best locations keep mirrors safe from bumps while staying functional for daily use.
Combining leaning art with furniture
Here’s a classic designer trick: lean a substantial mirror behind furniture pieces. This method creates beautiful layering and increases light throughout the room. Place the largest piece at the back, then work forward with smaller objects. Slight overlapping helps form a cohesive arrangement.
Rubber drawer liners or furniture pads under your leaning pieces prevent sliding on slippery surfaces. Heavy mirrors need furniture straps attached to the wall for safety.
Create texture with wood slats and molding kits
Textured wall treatments add depth that paint alone can’t match. DIY wall art has become available to more people, including renters and beginners, thanks to modern peel-and-stick options.
Using peel-and-stick wood slats
Wood planks with peel-and-stick backing give your walls a stunning look without much work. These wood panels come with a strong adhesive that sticks well to most interior walls. You can choose from weathered driftwood to sleek walnut finishes that can change your plain walls within hours. The best part? You won’t need any special tools – just peel off the backing and stick the panels on your wall. These panels are light yet tough enough to handle busy areas since they don’t scratch easily and only need a quick wipe now and then.
Installing removable molding for elegance
Removable wall molding adds a touch of Parisian charm without permanent changes. Unlike traditional nailed molding, this renter-friendly option uses double-sided mounting tape. Start by planning your pattern – keep equal spaces between rectangles (about 5 inches) and make sure all rectangles are the same size. Once you’ve measured and marked your wall, cut the molding pieces with a box saw guide. Then, put 2-3 strips of mounting tape on each piece and press them firmly against the wall.
Combining texture with color for impact
Texture and color work together to create visual interest that neither could achieve alone. Natural wood textures shine here – they create subtle shadows that change throughout the day and make simple colors look more refined. Soft sage green gains depth, navy blue becomes more complex rather than flat, and even white walls develop personality when paired with quality textured surfaces. This mix creates a thoughtful, designed look that stays beautiful as your style changes over time.
Conclusion
Transforming blank walls into a personalized gallery is easier than many think. Renter-friendly tools such as adhesive strips, peel-and-stick wood slats, and leaning mirrors allow you to decorate without damaging surfaces or risking your security deposit.
Mixing different textures, colors, and sizes of artwork brings depth and personality to any space. Incorporating original paintings or carefully chosen prints adds meaning and makes your walls feel truly yours. Step back frequently to adjust your arrangements and experiment with new layouts to keep your space fresh and engaging.
With these techniques, you can express your creativity confidently, create a home that reflects your style, and enjoy a beautiful, ever-evolving living environment without permanent changes.