
macOS 27 Ends Time Capsule Support: What to Do
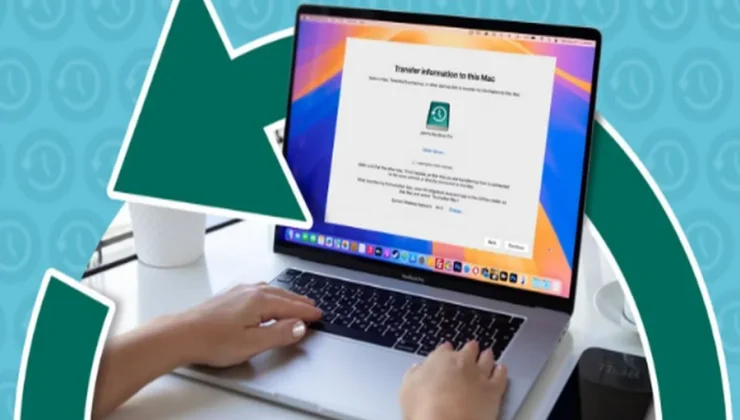
macOS 27 Ends Time Capsule Support: How to Protect Your Backups
If you’ve been using an AirPort Time Capsule for years, this change is worth your full attention right now. That little white box may still have years of photos, work documents, and full system backups you’ve never touched. But macOS 27 changes how Time Capsule can be used, and this is not a routine backup error you can ignore.
Apple confirmed that Apple Filing Protocol, or AFP, will be dropped in macOS 27 or later. Apple also notes that AirPort Time Capsule backup destinations are directly affected by this change. Before you go ahead and upgrade, take some time to back up your history and understand what this actually means for your files. This guide explains the reasons for the change, what to do before updating, and how Mac data recovery tools can help if something goes wrong along the way. Think of the next few sections more as a checklist than a lecture, because each step directly builds on the previous one.
Why macOS 27 Stops Supporting Time Capsule Backups
There’s a technical change, but let’s break it down in plain, simple terms so nothing feels confusing. Time Capsule has always used AFP to create its traditional Time Machine backup connection over your home network. With AFP being removed entirely in macOS 27, Time Capsules can no longer be used as standard Time Machine destinations.
Here is what that actually means for the data already sitting on your device:
- The data you have stored isn’t going to disappear overnight or automatically delete itself off your device.
- The first thing you need to do is to protect the backup data that’s inside your Time Capsule.
- Erasing or discarding the device should be your last step, not your first reaction to this news.
Many users panic and unplug their Time Capsule when they hear about this change, which isn’t necessary. Your files are safe and accessible as long as you still have a Mac running an older version of macOS. That compatibility window is precisely what gives you the time you need to plan a safe transition.
Create a Backup Exit Plan Before Updating
All good transition plans follow a simple 3-step strategy: verify, copy, and replace your setup. First, verify that you can still open your most recent Time Capsule backup on macOS 26 or an earlier compatible Mac. This single step ensures the backup is actually readable and not silently corrupted after months of unattended operation.
| Priority | Action | Goal |
| Verify | Confirm the latest Time Capsule backup can still be opened on macOS 26 or an earlier compatible Mac. | Ensure the backup is readable. |
| Copy | Restore critical files, including Photos, Documents, Desktop, and project folders. | Create accessible file copies. |
| Replace | Set up a modern Time Machine destination before installing macOS 27 | Maintain continuous protection |
Steps to Follow, in Order
- Copy your priority files first. At this time, priority should be given to Photos, Documents, Desktop items, and any active project folders.
- Set up the new destination before upgrading. Do this before you even think about installing macOS 27, because if you skip ahead, you’ll have no safety net.
- Test-restore one noncritical file. Choose something small and unimportant, restore it, and ensure it completes with no errors or warnings.
This simple test lets you know if the current backup will actually be useful in an emergency. If that little restore fails, you want to know now, not during a real crisis later.
Choose a Replacement for Time Capsule
No one needs to turn comparing replacement options into an overwhelming research project. Apple officially lists directly connected external storage, SMB-capable NAS devices, and Mac shared folders as supported destinations. Time Capsule is AFP-based, and AFP-based solutions are no longer recommended for macOS 27 and beyond.
Local and Network Options
- External SSD or hard drive: This is still the simplest solution for most single-Mac households. You plug it in, format it properly, and Time Machine handles most of the rest automatically.
- NAS over SMB: If you have multiple Macs in your household that share a single backup system, a NAS device changes the equation considerably. For multi-Mac households, a NAS that specifically supports Time Machine over SMB is usually your best bet, as it centralizes backups over your existing network.
- Shared folder on another Mac: This works fairly well as a network destination, so long as that Mac remains powered on.
Whatever you decide to go with, stick with reliability and consistency over pure storage space or brand loyalty. A smaller drive that backs up faithfully every night beats a huge one that occasionally fails silently.
Where Cloud Backup Fits In
You might also want to consider cloud backup services, but as a secondary layer rather than your only protection. Local hardware failures are 100% protected by an offsite copy stored in cloud services such as iCloud Drive or third-party services. They will not replace a full Time Machine backup, since restoring an entire system from the cloud is slow. Still, pairing local backups with a cloud copy of your most irreplaceable files adds real peace of mind.
Move Important Data Out of Your Time Capsule
A safe migration workflow protects you from the most common mistakes people make during this transition:
- Continue to access your existing Time Capsule normally with a compatible Mac running macOS 27 or earlier. This older machine serves as the link between the outdated hardware and your new backup setup.
- Copy or restore irreplaceable folders straight to a trusted cloud location or a new external hard drive. Think long and hard about what really matters here, including family photos, tax records, and unfinished creative projects.
- Add the new destination in Time Machine’s preferences on that Mac, then let a complete, fresh backup finish running. Do not rush this stage, since an interrupted first backup can sometimes leave gaps in your protection.
- Don’t erase the old Time Capsule immediately after copying files. Keep it intact as an archive. Do not do anything until you have validated the new backup and have successfully restored a sample file from it.
Only after that confirmation should you consider retiring, repurposing, or recycling the old Time Capsule hardware.
Recover Files If the Time Capsule Migration Fails
Even if you follow all the recommended steps, migrations don’t always go exactly as planned. Files can go missing after copying data, a local backup drive can get accidentally erased, and Mac files may disappear during the transition.
If any of this happens to you:
- Stop writing to the affected drive immediately. If you keep using the drive after losing data, you may overwrite the very files you are trying to recover.
- First, check Time Machine, iCloud Drive, and restored folders. Sometimes “missing” files are just hanging out in some other place than you thought.
- Consider dedicated Mac hard drive recovery software if those checks come up empty.
Why 4DDiG Data Recovery Helps
A tool like 4DDiG Data Recovery can be really useful in a stressful moment. It aims to scan Mac-formatted drives such as external SSD’s, Hard Drives, and even Time Capsule volumes when available. The software supports APFS and HFS+ file systems, so it covers virtually every modern and older Mac backup. The software is among the best data recovery software for Mac users. It handles common loss scenarios very reliably, such as accidental deletion, formatting errors, or files that disappeared during a botched backup transfer.
Step-by-step operation demonstration:
Download and install 4DDiG Data Recovery on your Mac running a compatible version of macOS. The setup is quick, with the installer guiding you through it, and no advanced technical knowledge is required to get started.
Connect the affected drive, which could be an SD card, a new external drive, or your old Time Capsule volume. Before you start scanning, make sure the drive is mounted properly and appears in the Finder.
Choose the drive in the app and initiate a deep scan to find lost or missing files. The deep scan option digs into the surface file system and finds data that standard tools often miss entirely.
Preview recoverable files by type, including photos, documents, videos, and compressed archives, before committing to anything. This preview step tells you whether a file is intact and worth recovering before you spend time on it.
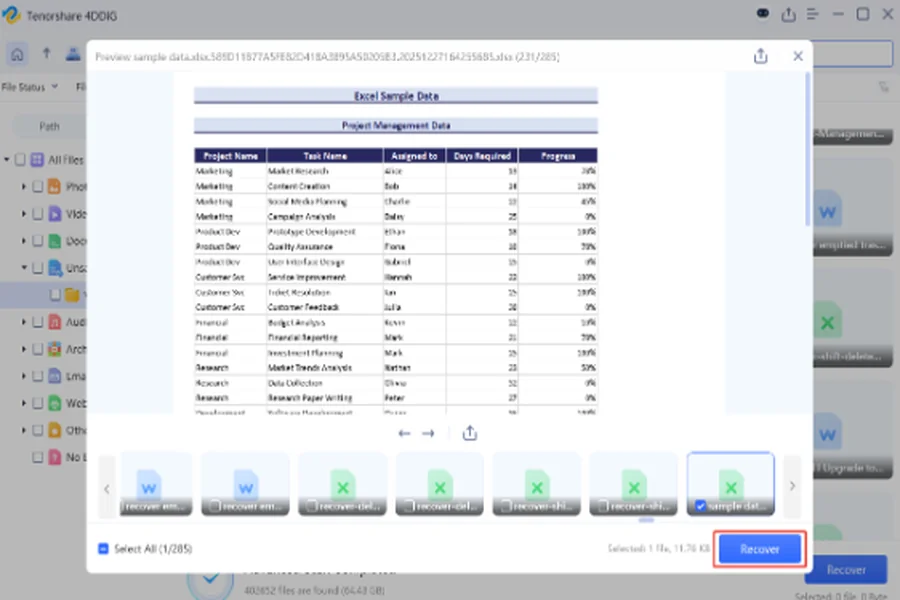
Select a different destination drive and restore your selected files there. Nothing gets overwritten on the source. When the restore is finished, open a few files to make sure everything was copied over correctly and that the restore is complete.
If you have broader Mac data recovery needs beyond this specific migration, the tool can also address general file loss situations. If you accidentally delete a folder or your drive suddenly becomes unreadable, it provides a simple recovery path. If you want to know more about the general recovery tool, you can visit the Tenorshare 4DDiG free data recovery. If you have Mac-specific scenarios like this Time Capsule transition, they have a dedicated Mac data recovery page with more details. Always recover files to a different drive, not the source location. This one habit greatly improves your chances for successful recovery.
Confirm Your New Backup Strategy Works
Before you call the entire transition complete, run through a short but important verification checklist:
- Make sure Time Machine is actually running on your new destination. Open Time Machine preferences and verify the timestamp of the last successful backup.
- Test restoration of a dummy document from the new backup to verify the entire process works end-to-end in the same way as the previous test-restore step.
- If applicable, enable encryption for your backups, especially if your backup destination is network-based (e.g., a NAS device or a shared folder on another Mac).
- Keep your original Time Capsule archive until every essential file and backup routine has been thoroughly checked.
Time Machine itself can back up applications, music, photos, email, documents, and virtually any other Mac file type. Once your new destination reliably takes care of all that, you’re really done with Time Capsule. Give yourself a week or two of monitoring before you retire the older hardware from active use. This patience costs you next to nothing but could save you from a painful, avoidable data loss later.
FAQs
-
Does macOS 27 completely kill the AirPort Time Capsule?
Time Capsule will no longer function as a backup destination due to the removal of AFP-based Time Machine support in macOS 27. Installing the update will not automatically delete existing backup data.
-
Can I still restore files from an old Time Capsule backup?
Yes, of course. You can restore your files on a Mac running macOS 26 or earlier, then copy them to a new location. Once copied, move those files to a supported backup destination for ongoing protection.
-
Can I use an SMB NAS with Time Machine on macOS 27?
Yes, Time Machine over SMB connections is fully supported for compatible network devices in macOS 27. Just make sure your particular NAS explicitly supports Time Machine over SMB before you try anything.
-
Can 4DDiG recover files lost during the Time Capsule transition?
Yes, 4DDiG can recover files lost during migration from accessible local drives and external drives. Always restore files to a different drive to avoid accidentally overwriting the data you need.
-
What if I don’t have a Mac running macOS 26 or earlier to access my Time Capsule?
You can use a Windows PC and third-party software that supports HFS+ or APFS drives. Or borrow a compatible Mac from a friend or colleague first to safely retrieve your files.
Final Thoughts:
Losing AFP support in macOS 27 seems disruptive at first, but it does not mean losing your backup history. Don’t panic; instead, this is a nudge to upgrade your setup. Before you upgrade anything, check your current Time Capsule backup, copy what matters most, and build a replacement destination. Keep the old hardware as an archive until your new system has proven itself through several backup cycles. If the files get lost somewhere in the process, the best data recovery software mac gives you a real second chance. With a bit of patience and a careful plan, this transition becomes routine maintenance rather than a stressful scramble to save your files.